
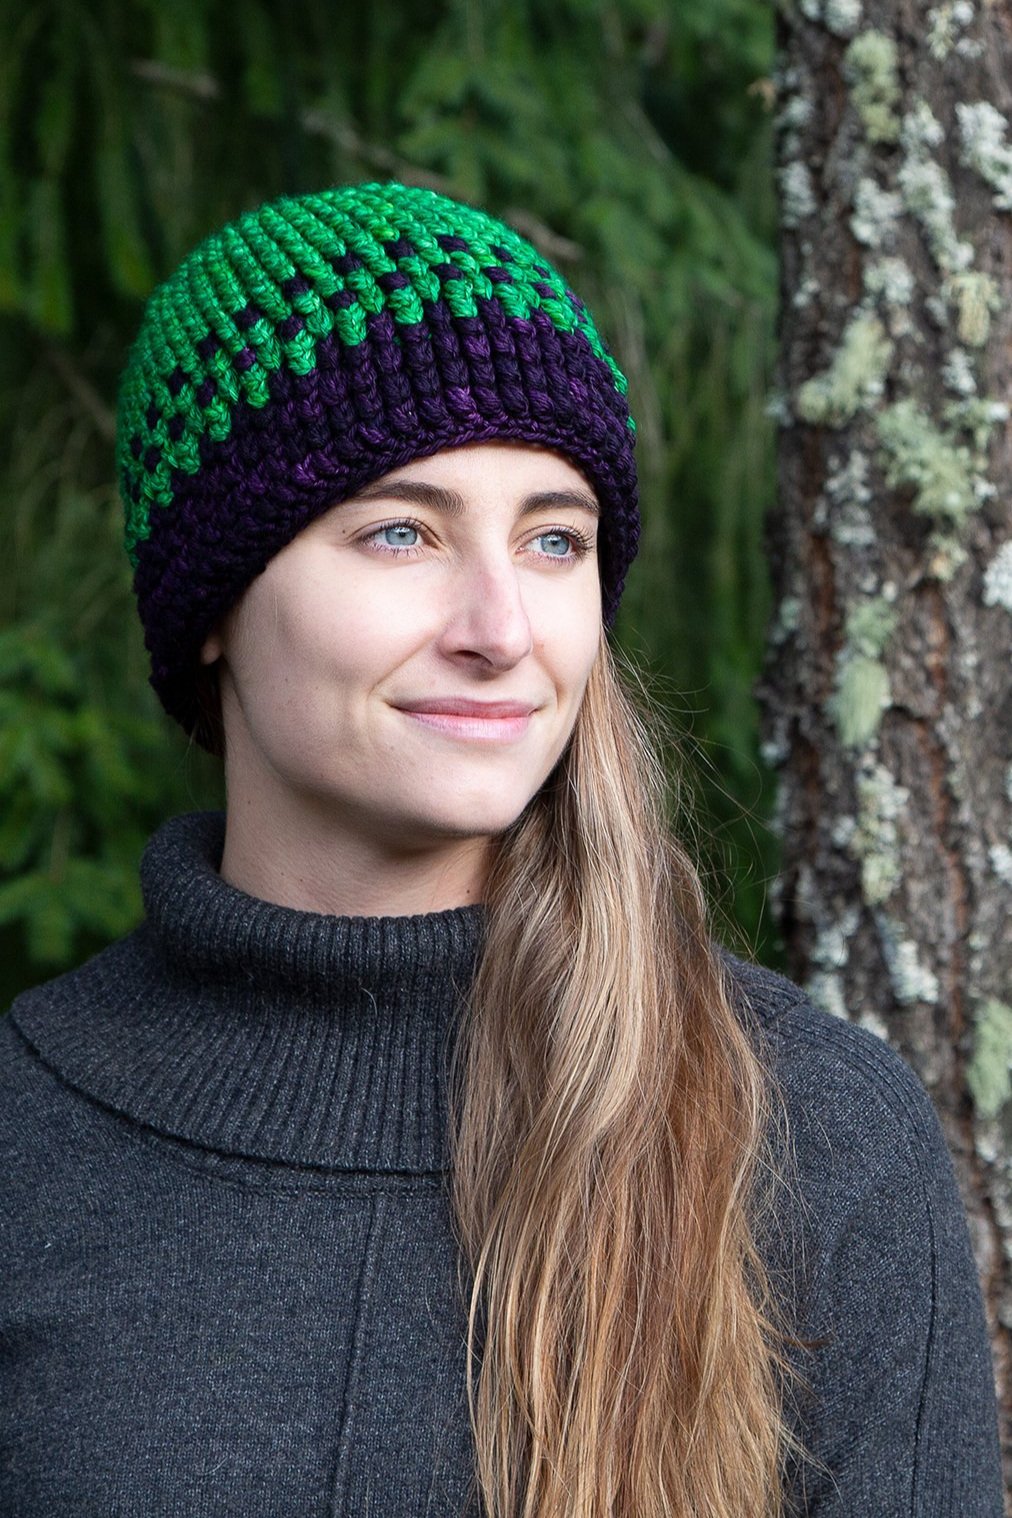
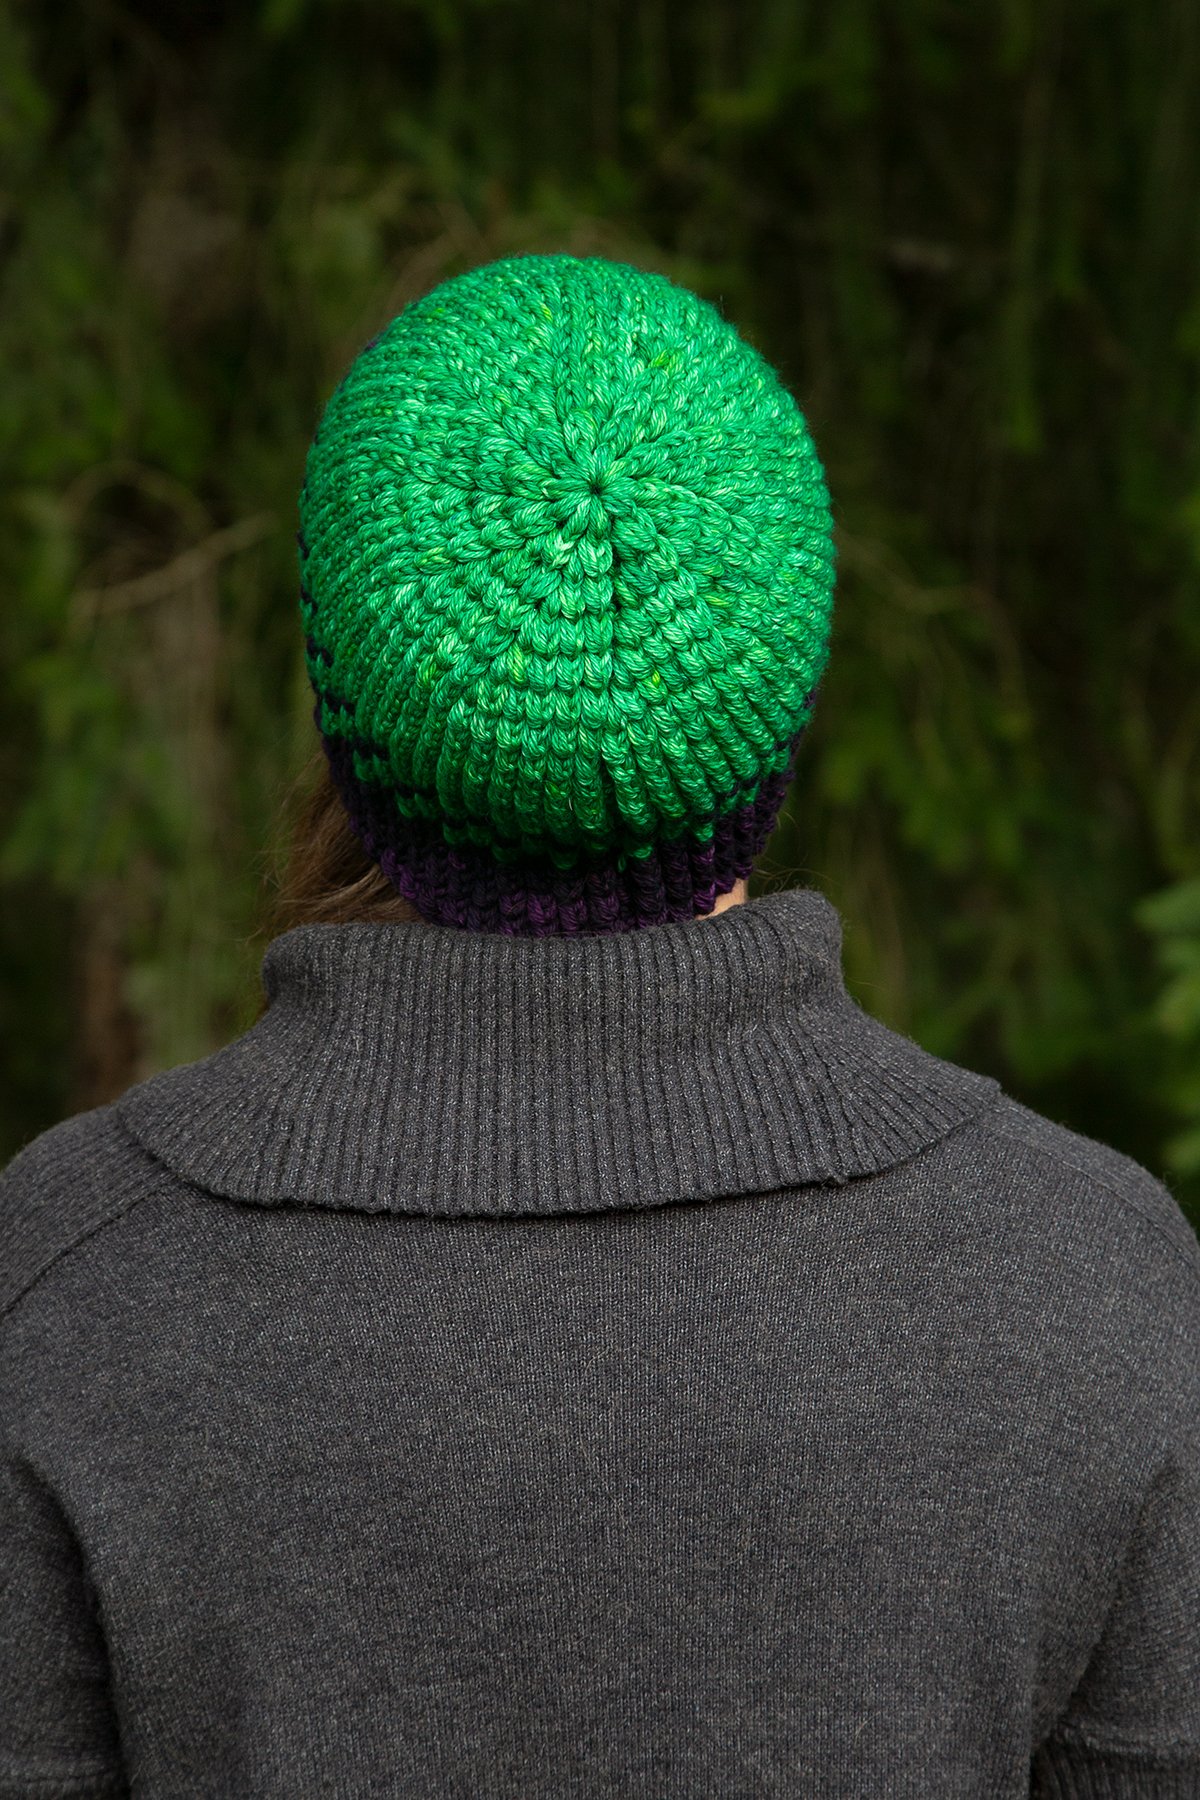
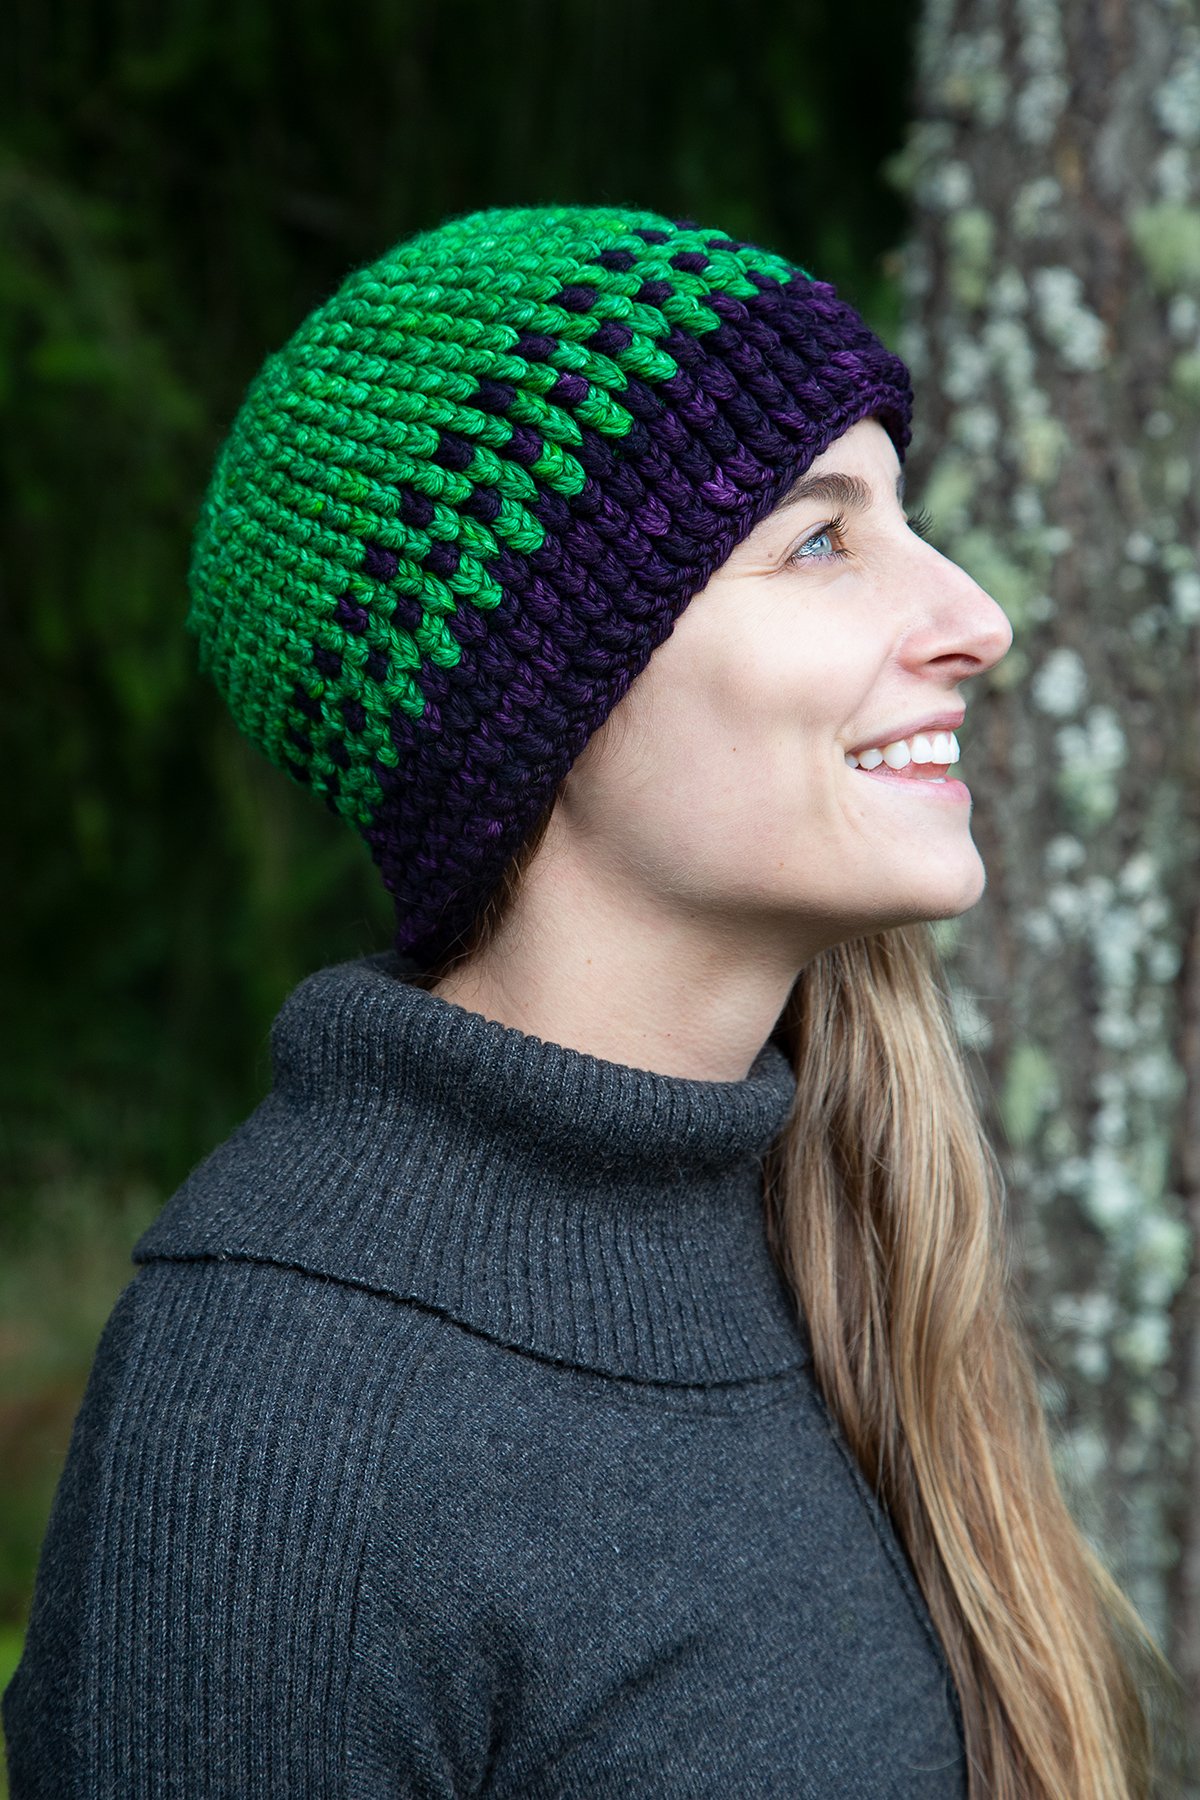
Yarn Dragon Beanie | Free Crochet Pattern
Her emerald and deep purple scales shimmer as she spreads her wings to take flight. The villagers have left gifts for her in their fields; her fiery heart is joyous at the sight of enormous balls of yarn in every direction! This is her favorite time of year. She carefully gathers each ball and carries them to her hoard, delighting in the fibers, colors, and craftsmanship of each one.
PATTERN OVERVIEW
Difficulty
Intermediate
Finished Measurements (inches/cm)
21” in circumference x 8.5” tall (53.3 cm x 21.6 cm)
Gauge in Pattern
After completing RND 7, the diameter of your hat’s crown when laid flat should measure 6.5 inches (16.5 cm).
Techniques
Post Stitches, Puff Stitches, Working in the Round, Top-down Stitching
Additional Notes
The Yarn Dragon Beanie is worked top-down and in the round by joining each round with a SLST.
MATERIALS
Yarn
301 yards (275 meters) of worsted weight
Outcast Relics, Worsted Weight (100% Merino), (1) skein: 218 yards (311 meters) and 100 grams (3.5 ounces) per skein
Main Color: Emerald, (1) skein, 218 yards (199 meters)
Color A: Dusky Evenfall, (1) skein, 83 yards (76 meters)
Hook
US Size I/9: 5.50 mm
Other Materials
Tapestry Needle, Scissors, Pom-Pom (optional)
ABBREVIATIONS (US terms)
CH: Chain
MC: Magic Circle (Magic Loop, Adjustable Ring)
Make a loop with the yarn around your fingers with the tail end of the yarn behind the working yarn (the yarn coming from the skein), leaving a tail about 6 inches long. Hold the place where the yarn overlaps between your thumb and forefinger. Insert your hook through the loop and bring through a loop of the working yarn; one loop is now on the hook. CH the appropriate number of STS for the ST that will be worked into the MC (e.g. 3 CHs for a HDC). Work the desired number of STS around the ring, working over both the working yarn and the tail so that the tail can be pulled to close the circle when all stitches are completed.
PUFF:
*YO, insert hook into the stitch and pull up one loop. Repeat from * twice working into the same stitch, being careful to keep the loops loose. There should now be seven loops on the hook. YO and draw the yarn through six loops. YO and draw the yarn through the remaining two loops on the hook.
RND(S): Round(s)
SC: Single Crochet
SLST: Slip Stitch
ST(S): Stitch(es)
YO: Yarn Over
SPECIAL STITCHES
FP-PUFF: Front Post Puff
Working around the post of the indicated ST from front to back, *YO, insert hook into the stitch and pull up one loop. Repeat from * twice working into the same stitch, being careful to keep the loops loose. There should now be seven loops on the hook. YO and draw the yarn through six loops. YO and draw the yarn through both loops on the hook.
PATTERN
Main Color
RND 1: First round is worked in a MC. CH 2 (does not count as ST now or throughout pattern). 10 PUFF in MC. SLST to first PUFF to join (10).
RND 2: CH 2. *PUFF in next ST. FP-PUFF around same. Repeat from * around. SLST to first PUFF to join (20).
RND 3: CH 2. *PUFF in next ST. FP-PUFF around same. FP-PUFF around next ST. Repeat from * around. SLST to first PUFF to join (30).
RND 4: CH 2. *PUFF in next ST. FP-PUFF around same. FP-PUFF around next 2 STS. Repeat from * around. SLST to first PUFF to join (40).
RND 5: CH 2. *PUFF in next ST. FP-PUFF around same. FP-PUFF around next 3 STS. Repeat from * around. SLST to first PUFF to join (50).
RND 6: CH 2. *PUFF in next ST. FP-PUFF around same. FP-PUFF around next 4 STS. Repeat from * around. SLST to first PUFF to join (60).
RND 7: CH 2. FP-PUFF around each ST. SLST to first FP-PUFF to join (60).
Measure for gauge. The diameter of your hat’s crown when laid flat should measure 6.5 inches (16.5 cm).
RNDS 8-12: Repeat RND 7 five more times.
RND 13: CH 2. *FP-PUFF around next ST. CH 1, skip 1. Repeat from * around. SLST to first FP-PUFF to join (60).
Color A
RND 14: CH 3 (counts as beginning CH-2 and CH 1 ST now and throughout pattern). Skip 1. Working over the CH-1 of RND 13, FP-PUFF around next skipped ST of RND 12. *CH 1, skip 1. Working over the CH-1 of RND 13, FP-PUFF around next skipped ST of RND 12. Repeat from * around. SLST to third CH at the beginning of the RND to join (60).
Main Color
RND 15: CH 2. *Working over the CH-1 of RND 14, FP-PUFF around next skipped ST of RND 13. FP-PUFF around next ST of RND 14. Repeat from * around. SLST to first FP-PUFF to join (60).
Color A
RND 16: Repeat RND 13.
Main Color
RND 17: CH 2. * FP-PUFF around next ST of RND 16. Working over the CH-1 of RND 16, FP-PUFF around next skipped ST of RND 15. Repeat from * around. SLST to first FP-PUFF to join (60).
RND 18: Repeat RND 13.
Color A
RND 19: Repeat RND 17.
RNDS 20-22: Repeat RND 7 three more times.
RND 23: CH 1 (does not count as a ST). SC in each ST around. SLST to first SC to join (60).
Fasten off and weave in ends.
Top with pom-pom if desired!